
If I’m thinking about PRP for my face, the short answer is this: it usually takes 45 to 90 minutes per session, most people need 3 to 4 treatments set 4 to 6 weeks apart, and the main skin changes often show over 3 to 6 months.
PRP uses my own blood. A clinician takes a small sample, spins it in a centrifuge for about 10 to 15 minutes, then places the platelet-rich plasma back into the skin by microneedling, fine injections, or both. Because it uses my own blood, the risk of an allergic reaction is low.
Before I book, these are the main points I need to know:
- What it may help with: texture, fine lines, hydration, elasticity, and acne scarring
- What it will not do: it will not replace surgery for loose skin or fillers for lost volume
- Who should avoid it: people with blood disorders, active infection, clotting problems, some autoimmune conditions, cancer, pregnancy, breastfeeding, or recent isotretinoin use
- How to get ready: avoid alcohol for 24 to 48 hours, drink more water, eat before the appointment, and ask about stopping ibuprofen, aspirin, naproxen, and some supplements
- What happens after: redness, swelling, tenderness, and small marks can last 24 to 72 hours
- How long results may last: often 12 to 18 months, with top-up sessions every 6 to 12 months
| Stage | What I can expect |
|---|---|
| Consultation | Medical history, consent, skin review, photos |
| Blood draw | Around 10 ml to 60 ml taken from my arm |
| PRP prep | Centrifuge spin for 10 to 15 minutes |
| Treatment | Microneedling, injections, or both |
| Recovery | Redness and mild swelling for 1 to 3 days |
So if I want a skin treatment that works in stages, not overnight, PRP may suit me – as long as I’m medically suitable and clear on the likely results.
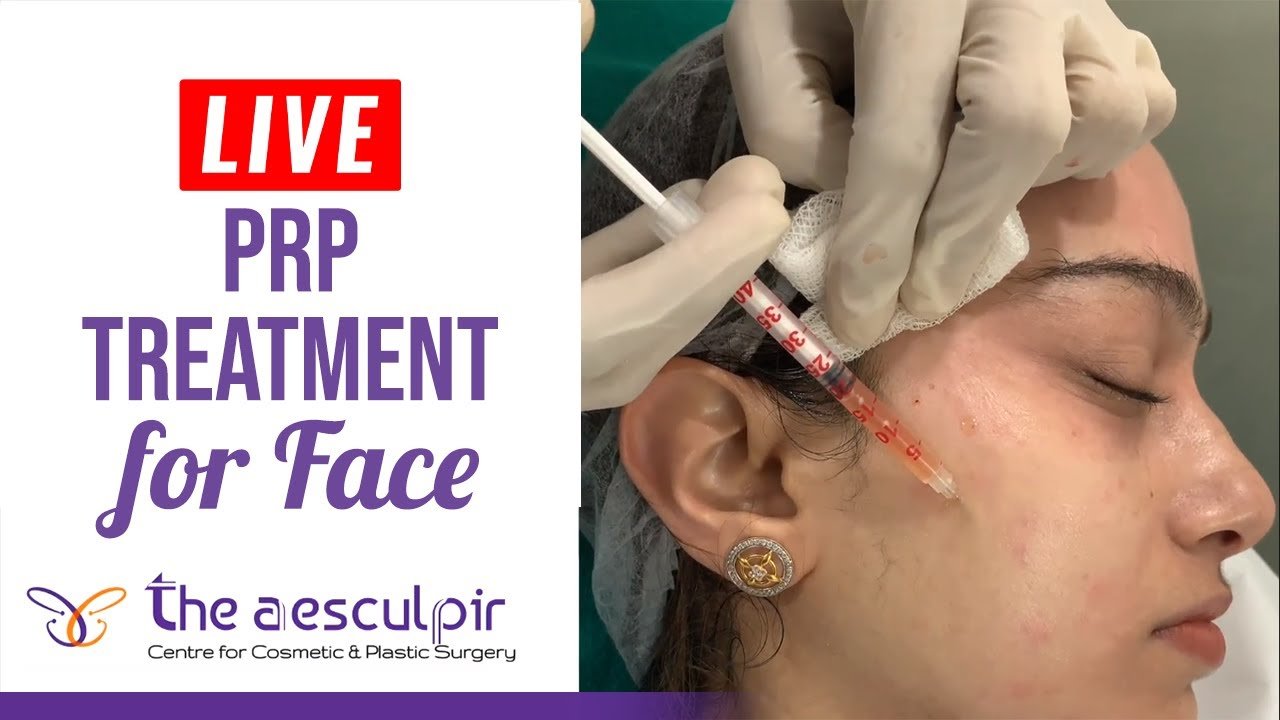
PRP Treatment For Face – How Is It Done? | The Aesculpir | Best Cosmetic Treatments in Delhi
sbb-itb-4219cc3
Understanding PRP and whether it suits you
PRP stands for platelet-rich plasma. It’s made from your own blood and contains a higher concentration of platelets than usual. Because the treatment uses your own blood, allergic reactions are rare. PRP is a regenerative treatment, which means it supports your body’s natural repair process instead of adding a synthetic substance.
How PRP works in facial aesthetics
The process starts with a small blood sample, usually 15 ml to 60 ml, taken from your arm in much the same way as a standard blood test. That sample is then placed in a medical-grade centrifuge and spun for 10 to 15 minutes. This separates the blood into layers, so the clinician can extract the platelet-rich plasma.
That plasma contains around 3 to 10 times the normal platelet concentration found in whole blood.
Platelets contain proteins known as growth factors, including PDGF, VEGF and TGF-β. When PRP is placed back into the skin, these growth factors switch on the body’s healing response. In simple terms, they help stimulate collagen and elastin synthesis, support new blood vessel formation, and speed up tissue repair.
This isn’t the sort of treatment that changes your skin overnight. Results develop bit by bit, with peak change usually showing over 3 to 6 months.
PRP can help with:
- skin texture
- elasticity
- hydration
- fine lines
- acne scarring
That said, it has limits. It can’t replace surgery if you have marked skin laxity, and it doesn’t do the job of dermal fillers when structural volume has been lost.
Once you know how PRP is prepared and what it can do, the next step is checking whether it fits your skin and health profile.
Who PRP is suitable for and who should avoid it
PRP tends to suit adults with early to moderate signs of ageing, such as dullness, uneven texture, fine lines, or acne scarring, especially if they want a more natural route without synthetic fillers. It also suits people with normal blood counts, realistic expectations, and the time to commit to a course of 3 to 4 sessions.
PRP is not right for everyone. You should avoid it if you have:
- a blood disorder
- an active infection
- an autoimmune condition
- a cancer diagnosis
- a clotting problem
Treatment should also be delayed during pregnancy, while breastfeeding, and for at least six months after isotretinoin. If you take anticoagulants or anti-inflammatory medicines such as aspirin or ibuprofen, speak to your practitioner before booking, as these medicines can affect platelet function.
If PRP looks like a fit, the next step is a baseline assessment before treatment.
Personalised assessment with Eternaface
A clear baseline before starting PRP makes a big difference. Eternaface offers AI-supported facial analysis to review skin quality and facial symmetry before treatment. For patients in Bristol, Bath, Cardiff, Swindon, Newport and Gloucester, that gives a clearer starting point for treatment planning.
How to prepare for your PRP appointment
If you’ve been cleared for PRP, use this timetable to get ready.
One to two weeks before treatment
Your clinician will go through your medical history and current medicines during your personalized skin consultation before treatment.
You’ll usually need to pause NSAIDs such as ibuprofen, aspirin and naproxen for 7 to 10 days beforehand, with clinical advice, because they can affect platelet function and increase the risk of bruising. That said, never stop a prescribed medication until you’ve spoken to the clinician or prescriber who issued it.
You may also be asked to pause fish oil, vitamin E, ginkgo biloba, garlic and ginger supplements for anywhere from 48 hours to one week before treatment. If you’ve used isotretinoin in the past six months, tell your clinician, as treatment should be delayed.
The final three days and the day of treatment
In the last 24 to 48 hours before treatment, drink more water than usual. Avoid alcohol during that same period. It’s also best not to smoke in the days leading up to your appointment, as smoking can slow healing.
On the day, eat a proper meal before you come in, ideally with protein and healthy fats. Turning up on an empty stomach can make you more likely to feel lightheaded during the blood draw.
A few simple prep steps also help things run smoothly:
- Arrive with clean skin and no make-up
- Wear comfortable clothing with sleeves that roll up easily
- Pause retinoids, AHAs, BHAs and vitamin C serums if your clinician tells you to
Once you’ve done these steps, the appointment usually moves straight into check-in, the blood draw and PRP preparation.
What happens during the PRP procedure
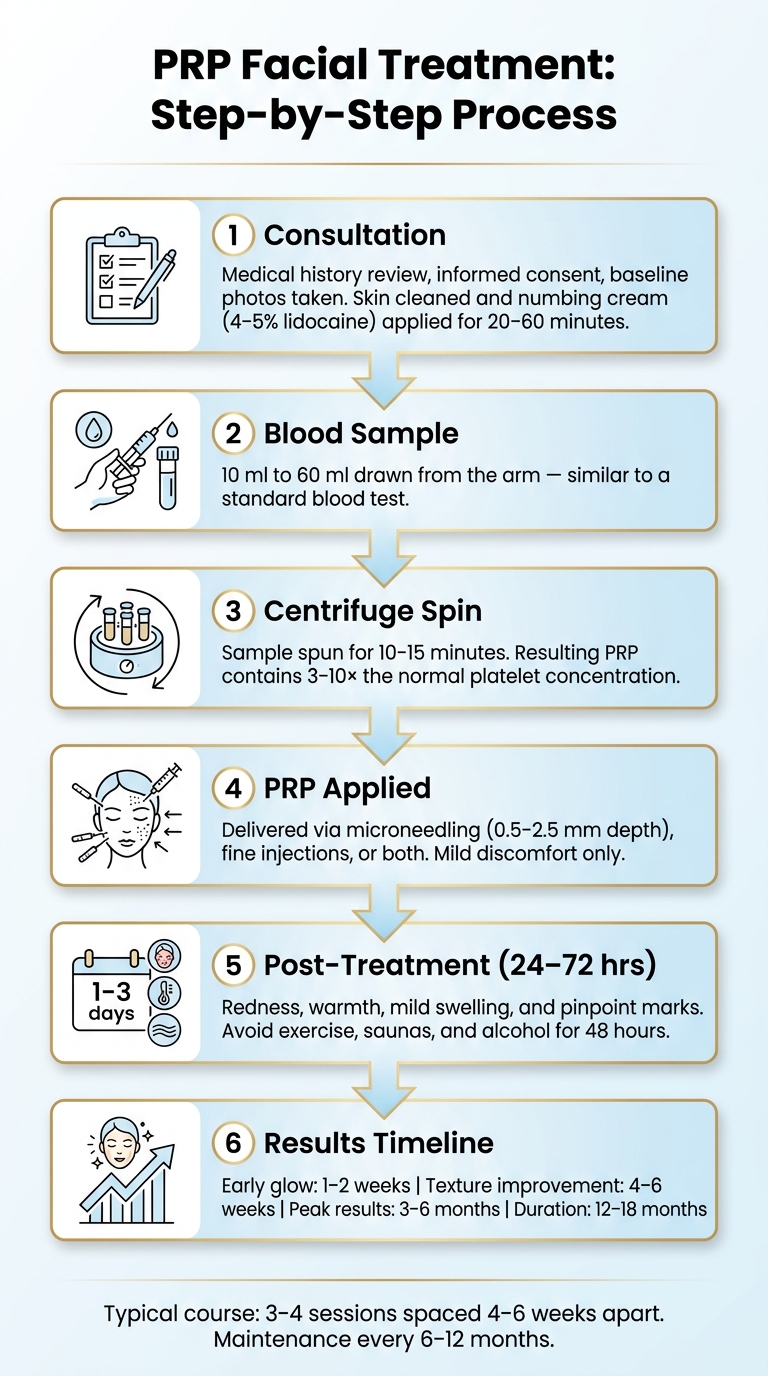
PRP Treatment Process: Step-by-Step Patient Timeline
From check-in to PRP preparation
Once you arrive, the appointment tends to follow a clear clinical routine. Your clinician will go over your medical history, confirm informed consent, and take baseline photos.
Next, your skin is cleaned and a topical numbing cream is applied across the treatment area. This is usually 4% to 5% lidocaine, and it’s left on for 20 to 60 minutes.
While the numbing cream takes effect, the clinician takes a small blood sample from your arm, usually 10 ml to 60 ml. That sample is then placed in a medical-grade centrifuge for about 10 to 15 minutes to separate the PRP. Once it’s ready, the PRP is used straight away.
How PRP is applied to the face
PRP can be applied with microneedling, fine injections, or a mix of both, depending on the area being treated. Microneedling creates micro-channels about 0.5 mm to 2.5 mm deep, while fine injections are often used for smaller or more exact areas, such as under the eyes.
Most people describe the treatment as mildly uncomfortable rather than painful. You may feel some stinging or pressure, and discomfort is usually rated low. Right after treatment, it’s common to see redness, mild swelling, and small pinpoint marks.
Safety, hygiene and clinical standards
This treatment should be carried out to strict clinical standards. PRP should be prepared in a sterile clinical setting using closed-system kits. These help reduce the risk of contamination and support a steady platelet concentration.
Throughout the procedure, the clinic should use sterile needles and single-use consumables. The treatment should also be done by a medically qualified practitioner, such as a GMC–, NMC– or GDC-registered professional.
Recovery, results and repeat sessions
After treatment, redness tends to calm down fast. But the visible changes usually take a bit more time.
The first 24 to 72 hours after treatment
It’s normal to have redness, warmth, tenderness and mild swelling for 24 to 72 hours. You may also notice light bruising or tiny marks around the injection sites. These usually fade within a few days.
Aftercare is fairly simple. For the first 48 hours, wash with lukewarm water and a gentle, fragrance-free cleanser. Skip strenuous exercise, saunas, steam rooms and swimming for at least 48 hours. On the first night, sleeping with your head slightly raised can help ease swelling.
You should also pause retinoids, vitamin C and exfoliating acids for 5 to 7 days. If you need pain relief, paracetamol is usually the better option. Avoid ibuprofen and aspirin for 48 hours.
When results appear and how long they may last
Results tend to build bit by bit, not all in one go.
Most patients notice an early glow or better hydration within 1 to 2 weeks. More visible changes in skin texture and tone often start to show between 4 to 6 weeks, as early collagen remodelling begins. Peak results usually appear at 3 to 6 months.
For facial rejuvenation, effects usually last 12 to 18 months. After that, a maintenance session every 6 to 12 months may be recommended.
Course planning, follow-up and key points
Once you’ve seen how your skin reacts, session timing becomes much easier to plan.
For most people, an initial course of 3 to 4 sessions spaced 4 to 6 weeks apart is a sensible starting point for general rejuvenation. Acne scarring often needs more sessions, while under-eye concerns may need a shorter initial plan.
| Concern | Initial Course | Spacing | Maintenance |
|---|---|---|---|
| General Rejuvenation | 3–4 sessions | Every 4–6 weeks | Every 12 months |
| Acne Scarring | 4–6 sessions | Every 4 weeks | As required |
| Under-Eye Concerns | 3 sessions | Every 4 weeks | Every 6–12 months |
About 10% to 30% of patients see limited improvement. That’s why a personalised clinical review matters. A follow-up assessment with Eternaface can help review how your skin has responded and map out maintenance based on your own results.
FAQs
Is PRP painful?
Most patients describe PRP treatment as mildly uncomfortable rather than painful. To help with comfort, a topical anaesthetic cream is usually applied to the treatment area 20 to 30 minutes beforehand.
During the session, you may feel slight pressure, tingling, or brief stinging. Even so, the treatment is generally well tolerated.
How soon can I wear make-up again?
Avoid make-up for at least 12 to 24 hours after PRP treatment. That gives your skin barrier time to recover and helps lower the risk of infection.
It’s also best to follow the aftercare advice your practitioner gives you during your consultation, as they’ll tailor it to your skin and treatment.
How do I know if PRP is right for me?
A consultation at Eternaface is the best way to work this out. Your practitioner will go through your medical history, look at your skin concerns, and talk through your aesthetic goals.
You may be a good fit if you’re in good health, have realistic expectations, and want a natural, gradual improvement. PRP may not be right for you if you have certain blood disorders, active skin infections, or if you’re pregnant or breastfeeding.